admin

Github GitlabCI/CD image

GitHub Actions vs GitLab CI/CD: How to Build CI/CD Pipelines in Each

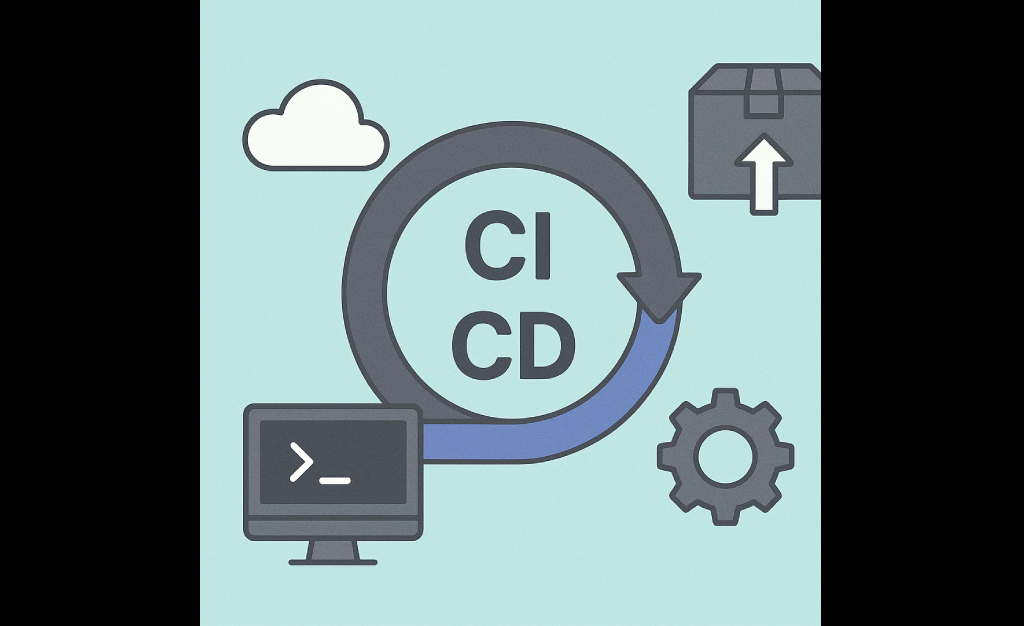
Modern software development thrives on automation — and CI/CD pipelines are the engine behind fast, reliable, and frequent software delivery. If you’re hosting your code on GitHub or GitLab, you already have access to powerful native CI/CD tools: GitHub Actions (built into GitHub) GitLab CI/CD (built into GitLab) But how do they compare? And how do you build a CI/CD pipeline in each? Let’s break it down.  What is CI/CD (Quick Recap)? CI (Continuous Integration): Automatically builds and tests code when you push changes. CD (Continuous Delivery/Deployment): Automatically prepares and/or deploys your code to staging or production. CI/CD pipelines: Reduce human error Speed up delivery Improve software quality Both GitHub Actions and GitLab CI/CD are automation engines that make this possible — directly in your code hosting platform. GitHub Actions vs GitLab CI/CD (Quick Comparison) Feature GitHub Actions GitLab CI/CD Integration Native to GitHub Native to GitLab Pipeline File Name .github/workflows/*.yml .gitlab-ci.yml Free Tier 2,000 minutes/month (private) 400 minutes/month (free plan) Runners (Agents) GitHub-hosted or self-hosted GitLab-hosted or self-hosted UI Experience Modern and integrated Powerful and robust Flexibility High, with matrix builds High, supports advanced DAGs Best For GitHub-based projects GitLab-based codebases   How CI/CD Works in GitHub (GitHub Actions) Step-by-Step Setup Create Workflow FolderInside your GitHub repo, create:  .github/workflows/ Add a Workflow File <pre><code># File: .github/workflows/ci.yml name: CI Pipeline on:push:branches: [ main ]pull_request:branches: [ main ] jobs:build:runs-on: ubuntu-latest steps:– uses: actions/checkout@v3 – name: Install dependenciesrun: npm install – name: Run testsrun: npm test</code></pre></div> 3. Push Code Every time you push code or open a pull request, the pipeline will run and appear in the Actions tab of your GitHub repo. How CI/CD Works in GitLab (GitLab CI/CD) Step-by-Step Setup Add .gitlab-ci.yml FilePlace this file in the root of your GitLab repo:   <pre><code># File: .gitlab-ci.yml stages:– build– test build_job:stage: buildscript:– npm install– npm run build test_job:stage: testscript:– npm test</code></pre>  Push Code GitLab automatically detects the .gitlab-ci.yml file and kicks off the pipeline. View PipelineYou can view real-time pipeline status under the CI/CD > Pipelines section in your GitLab project dashboard. Which Should You Use? Use Case Recommended Platform Your repo is hosted on GitHub GitHub Actions Your repo is hosted on GitLab GitLab CI/CD You need free and easy pipelines GitHub (for public repos) You want advanced pipeline graphs GitLab You like YAML automation in PRs GitHub You need tight GitLab ecosystem (issues, merge requests, etc.) GitLab   Tips for Both Platforms Use secrets: Store API keys and passwords securely in GitHub/GitLab secrets. Use caching: Speed up pipelines by caching node_modules, vendor, or build folders. Break into jobs: Use separate jobs for linting, building, testing, and deploying. Add notifications: Integrate with Slack, Discord, or email to receive status alerts. Final Thoughts Whether you use GitHub Actions or GitLab CI/CD, the key is this: Automate your delivery pipeline early. It saves time, prevents bugs, and keeps your team moving fast. Both platforms are powerful, customizable, and offer free usage tiers that are perfect for solo developers, open-source maintainers, and teams of all sizes. Reads also: Who Is a DevOps Engineer? Understanding the Role Behind Smooth Software Delivery What Is CI/CD? A Complete Guide to Continuous Integration and Continuous Delivery External Resources: GitHub Action vs GitLab

GitHub Actions vs GitLab CI/CD: How to Build CI/CD Pipelines in Each Read More »

what is CI/CD image

What Is CI/CD? A Complete Guide to Continuous Integration and Continuous Delivery

In a fast-paced digital world, users expect constant updates, bug fixes, and new features — without downtime. But how can development teams ship code frequently, reliably, and safely? Enter CI/CD — the backbone of modern DevOps practices. Whether you’re a solo developer or a team of 50 engineers, mastering CI/CD will speed up your release cycle, improve code quality, and reduce last-minute headaches. What Does CI/CD Mean? CI/CD stands for: Continuous Integration (CI): Automatically testing and integrating code changes every time a developer pushes to the shared repository. Continuous Delivery (CD): Automatically preparing, testing, and releasing builds to staging or production environments. Continuous Deployment (also CD): Automatically pushing every successful code change directly to production — no manual approval required. These practices automate the software development lifecycle, ensuring a fast, reliable, and repeatable release process. The CI/CD Pipeline: Stages Explained A typical CI/CD pipeline automates several stages of the software lifecycle: 1. Code Developers write code and push it to a version control system like Git (e.g., GitHub, GitLab, Bitbucket). This is the starting point of the pipeline. 2. Build The system automatically compiles the code or packages it into containers. This stage ensures the code runs properly in a clean environment. 3. Test Automated tests (unit, integration, UI) run to catch bugs early. If tests fail, the pipeline halts and notifies the developers. 4. Release If all tests pass, the pipeline packages the build (e.g., into a Docker image) and prepares it for deployment. 5. Deploy The system pushes the release to staging or production environments. This can be manual (in Continuous Delivery) or automatic (in Continuous Deployment). 6. Monitor Post-deployment monitoring helps catch any issues in real-time (using tools like Prometheus, Grafana, Datadog, or Sentry). Common CI/CD Tools Here are some popular tools that help automate the pipeline: Category Tools CI Servers Jenkins, GitHub Actions, GitLab CI, CircleCI, Travis CI Containerization Docker, Podman Orchestration Kubernetes, AWS ECS IaC (Infra as Code) Terraform, AWS CloudFormation Testing Jest, Mocha, Selenium, Cypress Monitoring Prometheus, Grafana, New Relic   Why Use CI/CD? Benefit Explanation Faster Releases Automates testing and deployment so teams can ship daily or even hourly. Improved Quality Bugs are caught early in testing stages, reducing risk. Consistent Builds Automating builds ensures that environments are reproducible and reliable. Better Collaboration Developers integrate small changes regularly, minimizing merge conflicts. Immediate Feedback Errors are reported right after a push — not days later in QA. Customer Satisfaction Faster features and fewer bugs = happier users.   Real-World Example Imagine you’re working on a React Native app. You push a new feature to GitHub: GitHub Actions kicks off your pipeline. Your app is built into an Android and iOS binary. Jest and Detox run tests. If successful, the app is uploaded to Firebase App Distribution or TestFlight. You get notified — and your testers do too — all within minutes. That’s the power of CI/CD. CI/CD Best Practices Keep builds fast: Aim for <10 minutes to avoid frustration. Test early and often: Run tests on every commit, not just before releases. Fail fast: Stop the pipeline on errors and notify developers immediately. Use feature flags: Deploy code safely without exposing it to users. Monitor deployments: Never deploy without observability in place. Automate rollback: Use blue-green deployments or canary releases for safe rollbacks. Conclusion: CI/CD Is a Must for Modern Development CI/CD is no longer optional — it’s essential. It empowers your team to: Deliver better software Reduce risks Innovate faster Whether you’re running a SaaS product, mobile app, or enterprise platform, setting up a solid CI/CD pipeline is a smart investment that pays off immediately. Reads also: GitHub Actions vs GitLab CI/CD: How to Build CI/CD Pipelines in Each Who Is a DevOps Engineer? Understanding the Role Behind Smooth Software Delivery External Resources: What is CI/CD? – AWS DevOps

What Is CI/CD? A Complete Guide to Continuous Integration and Continuous Delivery Read More »

who is a DevOps Engineer

Who Is a DevOps Engineer? Understanding the Role Behind Smooth Software Delivery

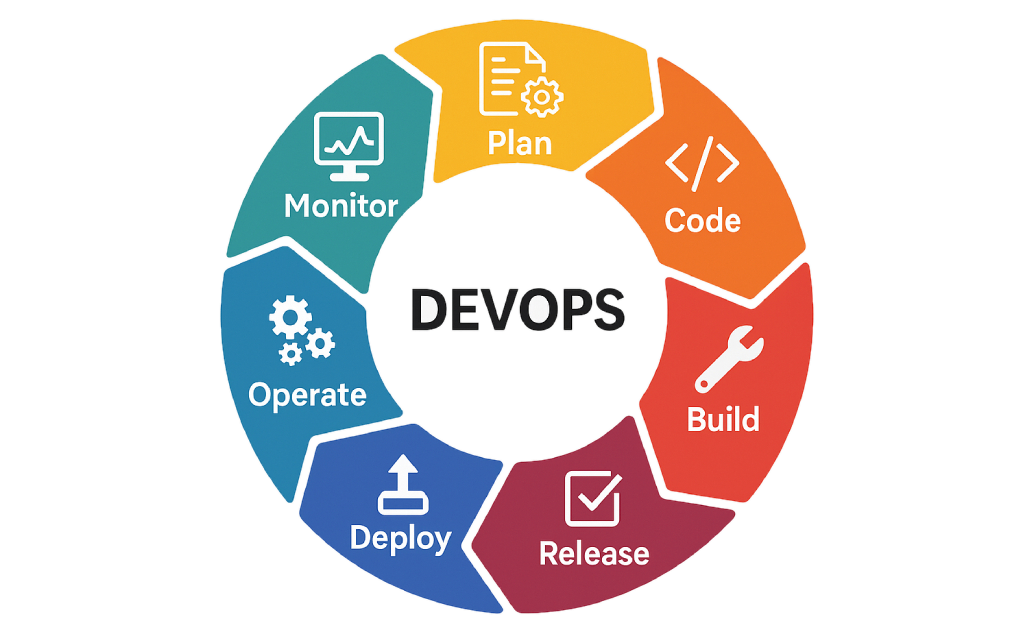
Who Is a DevOps Engineer? Understanding the Role Behind Smooth Software Delivery In today’s world of fast-paced development and continuous software delivery, one term consistently shows up in job listings and tech conversations: DevOps Engineer. But what exactly does a DevOps engineer do? Are they developers? System administrators? Cloud architects? Actually, the answer is a little bit of all three — and more. What Is DevOps? Before diving into the role, let’s understand the concept itself. DevOps combines two words: Development and Operations. It’s not just a tool or job title — rather, it’s a culture and practice that promotes collaboration between developers (who write the code) and operations teams (who deploy and manage it). Click here to read the article What is DevOps So, Who Is a DevOps Engineer? A DevOps Engineer works at the intersection of development and IT operations. Their job typically includes: Automating the software delivery process Ensuring stability and scalability of infrastructure Collaborating across teams to deliver features quickly Integrating tools, testing, security, and monitoring into every stage of development In short, this role builds pipelines, writes scripts, and designs systems so teams can ship software frequently, safely, and automatically. Key Responsibilities of a DevOps Engineer Here’s what a typical day might look like: Responsibility Description CI/CD Pipeline Setup Configure automated build, test, and deployment pipelines. Infrastructure as Code (IaC) Manage infrastructure using tools like Terraform. Cloud Infrastructure Deploy and manage on AWS, Azure, or GCP. Containerization & Orchestration Use Docker and Kubernetes for consistency. Monitoring & Logging Implement tools like Prometheus or Datadog. Security (DevSecOps) Embed security checks into CI/CD pipelines. Collaboration Work with developers, QA, and sysadmins to streamline delivery.   Skills a DevOps Engineer Needs Skill Area Examples Scripting Bash, Python CI/CD Tools Jenkins, GitHub Actions Cloud Platforms AWS, Azure, GCP Containers Docker, Kubernetes IaC Tools Terraform, Ansible Monitoring Prometheus, Grafana Version Control Git, GitHub OS Linux, Unix   DevOps in Action: A Real-World Example Picture a team working on a mobile app. Without modern practices: Code is manually tested and deployed. A single production bug can cause major downtime. Deployments happen once every few weeks. On the other hand, with DevOps: Every change is automatically tested. Deployment is automated and consistent. Failures are detected early and rolled back safely. That smooth, safe flow? It’s powered by DevOps engineers. Why DevOps Engineers Are in Demand Today, more businesses are moving to the cloud. Furthermore, fast delivery is now a competitive advantage. As a result, automation, cost-efficiency, and built-in security have become critical. This explains why DevOps engineers are among the highest-paid and most sought-after professionals in tech today. Want to Become a DevOps Engineer? Here’s a basic roadmap to get started: Learn Linux fundamentals. Master Git and version control. Practice Bash or Python scripting. Explore CI/CD tools. Get familiar with Docker and Kubernetes. Work with cloud services like AWS or GCP. Use Terraform to automate infrastructure. Study monitoring and DevSecOps principles. Final Thoughts A DevOps Engineer isn’t just tech-savvy — they enable speed, quality, and stability in modern software delivery. Whether you’re at a startup or in a large enterprise, having skilled professionals in this role can make all the difference. Ultimately, DevOps is more than a job. It’s a mindset that transforms chaos into confidence. Reads also: What Is DevOps? A Simple Explanation for Developers, Teams & Startups Choosing the Right Cloud Service: A Developer’s Guide to AWS, Azure, GCP & More External Resources: Microsoft Learn: DevOps Overview MGoogle Cloud: DevOps Solution DevOps at AWS (Official Guide)  

Who Is a DevOps Engineer? Understanding the Role Behind Smooth Software Delivery Read More »

What Is DevOps? A Simple Explanation for Developers, Teams & Startups

In modern software development, speed, collaboration, and continuous improvement are essential. That’s exactly where this culture comes in. But what exactly does it mean? A role? A toolset? A way of working? Let’s break it down. What It Really Means The term combines Development (Dev) and Operations (Ops). It represents a culture, a set of practices, and various tools aimed at bridging the gap between software creation and IT management. The goal?Deliver software faster, more reliably, and with fewer bugs. In traditional setups, developers would hand off code to operations teams. This approach eliminates that handoff, encouraging continuous cooperation. More Than Just Tools — It’s a Mindset Many associate it with Docker, Jenkins, or Kubernetes. Yet, while these tools are part of it, the heart lies in collaboration, automation, and feedback. Core Practices That Power This Approach Practice Description CI/CD Automate testing and deployment for faster releases Infrastructure as Code Manage infrastructure with code (e.g., Terraform) Monitoring & Logging Real-time tracking of performance and bugs Version Control Collaborate through Git or similar tools Containerization Ensure consistent environments using Docker Config Management Automate setups with Ansible, Chef, Puppet   Example Tools That Support Modern Workflows Category Examples Versioning Git, GitHub, Bitbucket CI/CD Jenkins, CircleCI Containers Docker, Podman Orchestration Kubernetes IaC Terraform Monitoring Prometheus, Grafana Config Ansible, Chef Cloud AWS, Azure, GCP   Why It Matters Without this approach: Releases take longer Deployment often breaks Teams operate in silos With it: Releases are frequent and smooth Automation reduces errors Collaboration improves Who Benefits Most? Startups aiming for rapid MVPs Enterprises with complex systems Web/mobile developers using CI/CD Cloud-native projects Final Thoughts This isn’t just a buzzword. It’s a shift that empowers teams to build, ship, and maintain better software. Whether you’re a solo dev or part of a big team, adopting these principles helps you work smarter. Reads also: Who Is a DevOps Engineer? Understanding the Role Behind Smooth Software Delivery Choosing the Right Cloud Service: A Developer’s Guide to AWS, Azure, GCP & More External Resources: Microsoft Learn: DevOps Overview MGoogle Cloud: DevOps Solution DevOps at AWS (Official Guide)  

What Is DevOps? A Simple Explanation for Developers, Teams & Startups Read More »

cloud services aws azure gcp and etc image

Choosing the Right Cloud Service: A Developer’s Guide to AWS, Azure, GCP & More

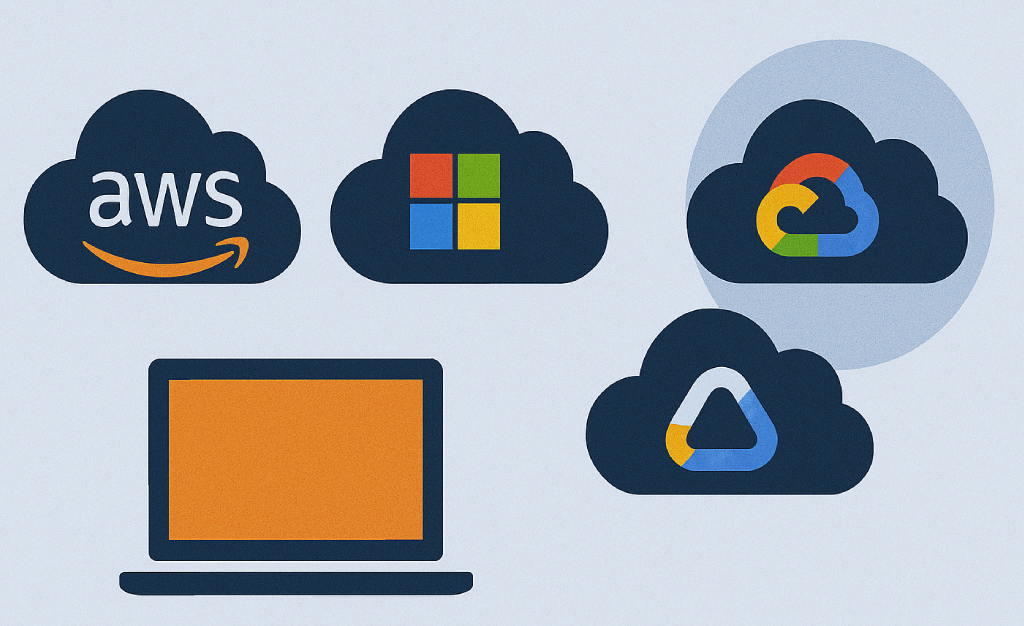
In today’s fast-moving digital world, cloud computing isn’t just a luxury — it’s a necessity. Whether you’re building a startup MVP, managing enterprise infrastructure, or launching the next viral app, your choice of cloud provider can make or break your project. With several powerful platforms on the market, how do you know which one is best for your needs? This guide breaks down the leading cloud services — AWS, Azure, GCP, DigitalOcean, and more — and compares them across key areas like pricing, scalability, performance, and usability. What Are Cloud Services? Cloud services provide on-demand computing resources such as servers, databases, storage, and networking — all accessible over the internet. Instead of purchasing and maintaining physical servers, you “rent” exactly what you need and scale up or down as your requirements change. Top Cloud Platforms at a Glance Here’s a quick overview of the most popular cloud providers trusted by developers and enterprises worldwide: Cloud Provider Best Known For Amazon Web Services (AWS) Broadest set of services & global reach Microsoft Azure Integration with Microsoft ecosystem Google Cloud Platform (GCP) Big data, ML, and Kubernetes expertise IBM Cloud Enterprise hybrid solutions & AI Oracle Cloud Databases and ERP systems DigitalOcean Simplicity and developer-first design Linode (Akamai) Transparent, affordable cloud compute Alibaba Cloud Asia’s top provider, great for commerce   Comparison Table Feature AWS Azure GCP DigitalOcean IBM Cloud Ease of Use Medium Medium Friendly Very Easy Medium Pricing Pay-as-you-go Competitive Flexible Flat-rate Enterprise Free Tier Yes Yes Yes Yes Yes (Lite) Compute Services EC2, Lambda VMs, Functions Compute Engine Droplets Bare Metal Storage Options S3, Glacier Blob Storage Cloud Storage Spaces (S3 API) Object, Block Database Services RDS, DynamoDB SQL, CosmosDB Firestore, BigQuery Managed SQL Db2, PostgreSQL AI/ML Tools SageMaker Azure ML Vertex AI Basic APIs Watson AI Best For Scale Enterprise AI/Data Startups Regulated Industries   How to Choose: Deep Dive by Use Case Choose AWS if you need global scale, advanced cloud tools, or enterprise-grade compute flexibility. It’s a favorite among large-scale startups and infrastructure-heavy systems. Go with Azure if your team relies on Microsoft tools like Office 365, .NET, or Active Directory. It’s also a smart pick for hybrid cloud needs. Pick GCP if your app is data-intensive or AI-driven. Google’s cloud excels in Kubernetes support and data analytics tooling. Select DigitalOcean if you’re a solo founder, startup, or agile team that values simplicity, transparent pricing, and quick deployments. Try IBM Cloud if you’re in a regulated sector like healthcare or finance, or need enterprise AI via Watson. Should You Use Multi-Cloud? Absolutely — and many companies already do. A multi-cloud approach allows you to: Prevent vendor lock-in Balance cost across providers Combine the best tools from each ecosystem (e.g., AWS compute + GCP ML) While it adds complexity, multi-cloud strategies can offer great flexibility if you manage them well. Final Thoughts There’s no universal “best” cloud provider. Your choice depends on your tech stack, team size, budget, and long-term goals. Here’s a quick recap: Choose AWS for scalability and flexibility. Use Azure if your team is Microsoft-heavy. Try GCP for data-driven or AI projects. Pick DigitalOcean for speed and simplicity. Explore IBM Cloud for compliance-heavy industries. Still unsure? Start small, test each platform’s free tier, and grow as your project evolves. Reads also: Who Is a DevOps Engineer? Understanding the Role Behind Smooth Software Delivery What Is DevOps? A Simple Explanation for Developers, Teams & Startups External resources: AWS Official Website Microsoft Azure Official Website Google Cloud Platform (GCP) Official Website

Choosing the Right Cloud Service: A Developer’s Guide to AWS, Azure, GCP & More Read More »

why i recommend strapi image

Why I Recommend Strapi for Quick Development

In today’s fast-paced development environment, time is everything. Whether you’re building a startup MVP, a content-driven web app, or a full-scale mobile backend, developers are constantly under pressure to deliver working software fast — without sacrificing flexibility or scalability. That’s where Strapi shines. What Is Strapi? Strapi is an open-source headless CMS built with Node.js. Unlike traditional CMS platforms like WordPress, Strapi doesn’t dictate how you present your content. Instead, it gives you full control over the API and lets you decide how, where, and in what format your content is consumed — be it web, mobile, or IoT. Why I Recommend Strapi for Quick Development 1. Instant REST or GraphQL API — No Backend Coding Needed With Strapi, you get a fully-functional API (REST or GraphQL) out-of-the-box just by creating content types from the admin panel. There’s no need to write any backend code to create, update, or fetch data. Build your API in minutes, not weeks. 2. Customizable Yet Minimal Boilerplate Unlike rigid CMS platforms, Strapi offers a perfect balance between out-of-the-box functionality and custom code freedom. Need to add custom routes, controllers, or middleware? It’s just Node.js — extend it easily. You save time but never feel locked in. 3. Powerful Admin Panel Strapi comes with a beautiful and intuitive admin dashboard that lets non-developers manage content effortlessly. This means developers can focus on code, while content creators and clients manage the actual content. Clear separation of concerns = faster workflows. 4. Authentication and Role-Based Access Control Built-In User authentication, permissions, and role management are built-in. Whether you’re creating public APIs or private dashboards, you can set access rules without writing everything from scratch. Skip weeks of building your own auth system. 5. Supports SQL and NoSQL Databases Strapi supports multiple databases like PostgreSQL, MongoDB, MySQL, and SQLite, making it flexible enough for prototypes and scalable enough for production.  Start fast on SQLite, scale to PostgreSQL later. 6. Seamless Integration with Frontends Because Strapi is headless, it works seamlessly with any frontend: React, Vue, Next.js, Nuxt, Flutter, or even native mobile apps. You’re never locked into a frontend stack.  Freedom to choose your frontend, now or later. 7. Open-Source and Actively Maintained Strapi has a thriving open-source community and regular updates. You’re building on a foundation trusted by thousands of developers and teams worldwide — including IBM, Toyota, and NASA.  Community support + enterprise-ready = smart choice. Use Cases Where Strapi Excels MVPs & Startups – Get your product to market in weeks, not months. Mobile App Backends – Deliver content-rich APIs for iOS & Android. Marketing Sites – Empower content teams without dev bottlenecks. E-commerce CMS – Customize product catalogs and content workflows. Internal Dashboards – Quick internal tools with secure access layers. Final Thoughts If you’re looking for a tool that lets you build fast, customize freely, and scale confidently, then Strapi is an ideal solution. It saves time on the backend, empowers non-technical teams with a powerful admin panel, and gives developers full control under the hood. For any project where speed, flexibility, and maintainability matter — Strapi is a no-brainer.   Related reads: Why My Strapi Deployment Kept Failing: Lessons from the Free Tier Trap Why I Recommend Strapi for Quick Development External resources: Strapi Official Documentation

Why I Recommend Strapi for Quick Development Read More »

How to Show Some Files from a Private S3 Bucket — While Keeping Others Hidden

When building apps that store files like images, PDFs, or videos using Amazon S3, the best practice is to keep your S3 bucket private. But what if you want to: Hide sensitive filesShow only allowed files to specific usersStill serve public assets like profile pictures or logos? Good news: you can do all this securely using pre-signed URLs and smart folder organization. Let’s walk through how.  Why You Shouldn’t Make Your S3 Bucket Public While you can make your bucket public, it’s strongly discouraged:  Anyone can access your files  Search engines might index them No access control Instead, keep the bucket private and generate secure, temporary URLs when users need to access private files. Basic Setup Here’s a typical setup using AWS S3 with a backend and a frontend app: S3 Bucket: private by default Backend (e.g., Strapi or Node.js): handles file uploads and generates access links Frontend (e.g., React Native app): fetches files only for authorized users Organize Your S3 Bucket for Access Control Use prefixes (folders) to separate file types and control access: <pre>s3://my-app-bucket/ ├── public/│ └── avatars/├── clients/│ ├── 001/│ │ └── journal.pdf│ │ └── mood-chart.png│ └── 002/│ └── mood-chart.png├── internal/│ └── admin-reports/</pre>    Explanation: /public/ → Used for public files like profile pictures. /clients/001/ → Private files for user ID 001. /internal/ → Admin-only files (e.g., internal reports). This structure makes it easy to control access based on folder paths. How to Show Private Files Securely: Pre-Signed URLs A pre-signed URL is a secure link to a private S3 file that: Expires after a short time Can’t be reused or bookmarked Is safe to send to the frontend Backend Code: Generate Pre-Signed URL (Node.js)  const AWS = require(‘aws-sdk’); // Load AWS SDK // Configure AWS S3 with your credentials const s3 = new AWS.S3({ accessKeyId: process.env.AWS_ACCESS_KEY_ID, secretAccessKey: process.env.AWS_ACCESS_SECRET, region: process.env.AWS_REGION, }); // Function to generate a pre-signed URL const getPresignedUrl = (key) => { const params = { Bucket: process.env.AWS_BUCKET_NAME, // Your S3 bucket name Key: key, // File path in the bucket Expires: 300, // Expiry time (300 seconds = 5 minutes) }; return s3.getSignedUrl(‘getObject’, params); };   Explanation: getSignedUrl() creates a temporary access link. The Expires value defines how long the link will work (e.g., 5 minutes). This URL can be used to fetch the file securely without making the bucket public. Add This to Your Strapi Controller  module.exports = { async getFile(ctx) { const { key } = ctx.query; // Extract file key from query (e.g., clients/001/journal.pdf) // Make sure the user has permission to access the file if (!ctx.state.user || !key.includes(`clients/${ctx.state.user.id}/`)) { return ctx.unauthorized(‘Access denied.’); } // Generate secure, time-limited link const url = getPresignedUrl(key); ctx.send({ url }); }, };  Explanation: ctx.state.user contains the authenticated user. The if check ensures users can only request their own files. If allowed, the signed URL is generated and returned. React Native Frontend Code  // Call your backend to get the signed URL const response = await fetch(`${API_URL}/api/get-file?key=clients/001/journal.pdf`); const { url } = await response.json(); // Use the URL to open or display the file Linking.openURL(url); // Opens in browser // OR <Image source={{ uri: url }} /> // Displays image in the app   Explanation: You request the file from your backend, not directly from S3. You then use the returned URL temporarily — it expires automatically. This keeps things secure while offering users access when needed. For Public Files: Set Bucket Policy You may have files (like logos or banners) that are okay to show publicly. In that case: Place them in a /public/ folder. Add this policy to your S3 bucket: { “Sid”: “PublicReadGetObject”, “Effect”: “Allow”, “Principal”: “*”, “Action”: “s3:GetObject”, “Resource”: “arn:aws:s3:::my-app-bucket/public/*” }   Explanation: This allows anyone to access files under /public/ The rest of the bucket stays private Great for assets like default avatars or app logos Best Practices at a Glance Strategy Why It’s Good Keep your bucket private Prevent accidental leaks Use folder prefixes (/public/, /clients/) Simplifies access control Use pre-signed URLs Secure, short-lived file access Validate user access before signing Prevents sharing someone else’s data Set URL expiry (3–5 mins) Minimizes the risk of misuse   Final Thoughts You don’t have to make your S3 bucket public or complex. Instead: Use folder structure to segment access Use pre-signed URLs for sensitive content Use bucket policies for safe public content This approach keeps your app secure, organized, and user-friendly — exactly what you want in a modern mobile or web app. Related reads: How to Set Up an S3 Bucket on AWS (Best Practices for Beginners) Understanding AWS IAM: The Key to Cloud Security for Beginners How to Set Up AWS CLI and IAM for S3 Bucket Access (Beginner-Friendly Guide) External resources: AWS Official Documentation

How to Show Some Files from a Private S3 Bucket — While Keeping Others Hidden Read More »

Nginx vs Apache: Which Web Server Should You Use?

When it comes to hosting web applications, two web servers dominate the conversation: Nginx and Apache. Both are powerful, open-source, and widely used  but they approach performance and architecture very differently. So which one is better? The answer depends on your use case, traffic, and tech stack. In this guide, we’ll break down the key differences, use cases, and when to choose one over the other. Quick Introduction Apache (HTTPD) Developed by the Apache Software Foundation Released in 1995 Known for its .htaccess support and flexible modular architecture Handles each connection with a separate thread or process Nginx (pronounced “Engine-X”) Created by Igor Sysoev in 2004 Built to solve the C10K problem (handling 10,000+ concurrent connections) Uses an event-driven, non-blocking architecture Famous for speed and low resource usage  Architecture: Process vs Event-Driven Feature Apache Nginx Request Handling Multi-threaded / process-based Event-driven / asynchronous Performance Slower under heavy traffic Excellent at handling high concurrency Resource Usage High memory with many connections Low memory footprint Scalability Limited by threads Built for scale   Verdict: Nginx wins for high-performance, high-traffic websites Configuration & Flexibility Feature Apache Nginx Configuration Files httpd.conf, .htaccess nginx.conf only .htaccess Support Yes — supports per-directory overrides ❌ Not supported Ease of Use Flexible but complex for beginners Clean and simple, but strict   Verdict: Apache wins for per-directory flexibility (like shared hosting) Static vs Dynamic Content Handling Task Apache Nginx Serving Static Files Good Excellent (super fast!) Handling Dynamic Content Embedded (PHP via mod_php) Reverse proxy to app server (e.g., PHP-FPM)   Verdict: Use Nginx for fast static sites and modern web stacks Use Apache for simple LAMP stack sites (PHP, MySQL) Reverse Proxy & Load Balancing Nginx is widely used as a reverse proxy, API gateway, or load balancer. Feature Apache Nginx (preferred) Reverse Proxy Supported (via mod_proxy) Built-in, faster, and more efficient Load Balancing Basic Advanced with health checks & retries   Verdict: Nginx dominates here — it’s the go-to choice for modern architectures like microservices or containerized apps (e.g., Docker, Kubernetes) Security & Community Support Aspect Apache Nginx Security Mature with strong updates Also secure and maintained actively Community Huge — decades of plugins Fast-growing, strong ecosystem Enterprise Apache HTTPD + Apache2 tools Nginx Open Source / Nginx Plus   Verdict: Both are secure and well-supported. Nginx is newer but backed by F5 and widely used by companies like Netflix, Airbnb, Dropbox Use Cases Use Case Recommended Web Server High-traffic APIs, React/Vue apps Nginx CMS like WordPress on shared hosting Apache Serving static files (JS, CSS, media) Nginx Custom PHP scripts via mod_php Apache Reverse proxy in front of Node/Flask Nginx   Can You Use Both? Yes! Many architectures use Nginx as a reverse proxy in front of Apache. Internet → Nginx (proxy) → Apache (app server) → PHP/MySQL This gives you: Speed and caching from Nginx Flexibility of Apache for complex backends Final Verdict You Should Choose If You Need… Nginx Fast static content, scalable performance, low resource usage, API proxying Apache Deep .htaccess support, shared hosting, legacy LAMP stack simplicity Related reads: Is PHP Dead Working with Docker External resources: Apache HTTP Server Official Documentation Nginx Official Documentation

Nginx vs Apache: Which Web Server Should You Use? Read More »

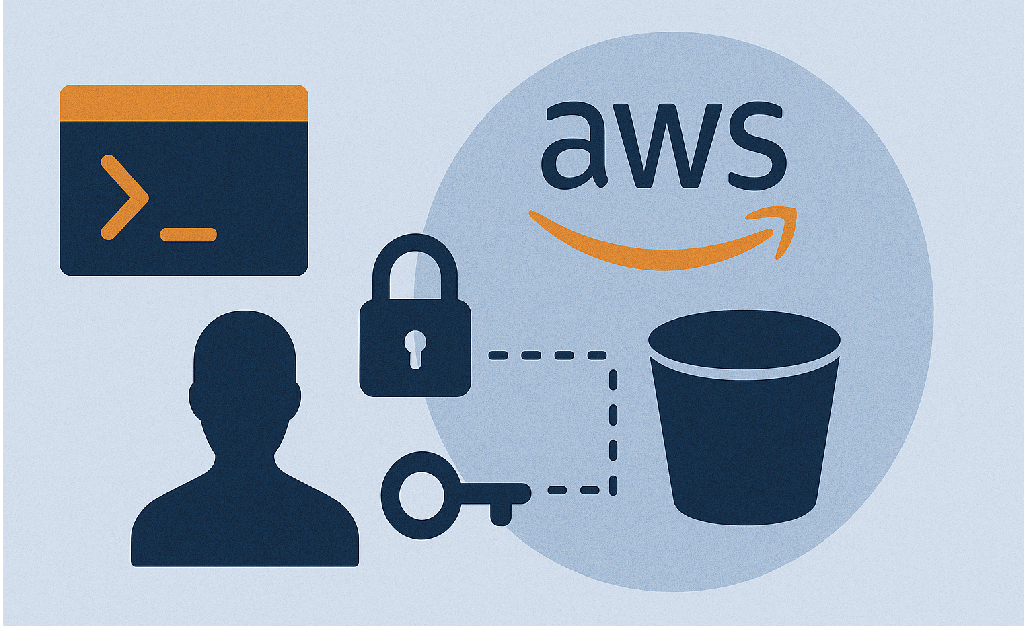
How to setup aws cli iam and s3 bucket

How to Set Up AWS CLI and IAM for S3 Bucket Access (Beginner-Friendly Guide)

If you’re building a web or mobile app and want to use AWS S3 to store images, files, or documents, learning how to set up the AWS CLI and IAM is a critical first step. In this guide, we’ll break it down step-by-step  no prior AWS experience required. What You’ll Learn  How to install and configure the AWS CLI How to create an IAM user with S3 permissions How to connect the CLI to your IAM user How to test S3 access using CLI commands Step 1: Install the AWS CLI The AWS CLI (Command Line Interface) allows you to control AWS from your terminal. Navitagate to this URL https://docs.aws.amazon.com/cli/latest/userguide/getting-started-install.html then scroll to AWS CLI install and update instructions For installation instructions, expand the section for your operating system. You will see 3 Operating Systems MacOS, Linux and Windows. In this tutorial we going to focus on the installion on the MacOS.  When u click on the MacOS panel u will the instructions Install and update requirements and Install or update the AWS CLI On Install or update the AWS CLI You are going to see 3 Horizonal tabs with labels GUI installer, Command line Installer – all users and Command line – Current user.  So we going to go with the Gui Installer you follow the process by downloading with this link In your browser, download the macOS pkg file: https://awscli.amazonaws.com/AWSCLIV2.pkg  and once its is downloaded. Open the pkg file and follow the prompt to install the AWS Cli.  Step 2: Create an IAM User in AWS Go to IAM Console Click Users > Add user Username: my-s3-user Select Programmatic access Click Next: Permissions Choose Attach policies directly Search for and select: AmazonS3FullAccess (or custom policy — see below) Optional (Best Practice): Create a custom policy that limits access to one bucket only. Example Custom IAM Policy (Write Access to One Bucket)  { “Version”: “2012-10-17”, “Statement”: [ { “Effect”: “Allow”, “Action”: [“s3:PutObject”, “s3:GetObject”], “Resource”: “arn:aws:s3:::my-app-bucket/*” } ]} Apply this if you want more control over your app’s security. Step 3: Save Access Credentials After creating the user: AWS will give you an Access Key ID and a Secret Access Key Copy and save these securely (you won’t see the secret again!) Step 4: Configure the AWS CLI with IAM Credentials Open your terminal and type aws configure You’ll be prompted for: AWS Access Key ID: xxxxxxxxxxxxxxxxxAWS Secret Access Key: xxxxxxxxxxxxxxxxxxxxxDefault region name [e.g. us-east-1]: us-east-1Default output format [json]: json  This saves your credentials to ~/.aws/credentials. Step 5: Test S3 Access from the CLI Upload a file:  aws s3 cp my-image.jpg s3://my-app-bucket/uploads/my-image.jpg   Download a file:  aws s3 cp s3://my-app-bucket/uploads/my-image.jpg ./downloaded.jpg   List files: aws s3 ls s3://my-app-bucket/uploads/    Best Practices for IAM + AWS CLI Best Practice Why It Matters Don’t use root account credentials Too powerful, not secure Use separate IAM users for each app Easier to track and revoke Limit access to only what’s needed Follows the “least privilege” rule Rotate keys regularly Reduces risk if exposed Use IAM roles for servers/apps More secure than hardcoding keys    Recap Now you know how to: Install and set up AWS CLI Create a secure IAM user Grant S3 access via policy Upload and download files via the CLI With this foundation, you can easily integrate S3 into your web, mobile, or backend app securely. Related reads: How to Set Up an S3 Bucket on AWS (Best Practices for Beginners) Understanding AWS IAM: The Key to Cloud Security for Beginners How to Show Some Files from a Private S3 Bucket — While Keeping Others Hidden External resources: AWS Official Documentation  

How to Set Up AWS CLI and IAM for S3 Bucket Access (Beginner-Friendly Guide) Read More »

understanding AWS IAM image

Understanding AWS IAM: The Key to Cloud Security for Beginners

If you’re getting into cloud computing with AWS, one of the most important — and often most misunderstood — concepts is IAM, short for Identity and Access Management. Whether you’re a developer, DevOps engineer, or a curious beginner, this post will help you understand what IAM is, why it’s critical, and how to use it securely in your AWS projects. What is IAM? IAM (Identity and Access Management) is the gatekeeper of AWS. It controls: Who can log in to your AWS account What they can do (read, write, delete, etc.) Which resources they can access (S3, EC2, DynamoDB, etc.) Think of it as your cloud security team, working 24/7. Why IAM Matters AWS is incredibly powerful — but with great power comes great responsibility. Without IAM, anyone with access to your account could: Delete your S3 bucketsExpose sensitive dataRun up huge bills by launching expensive services IAM helps you avoid these nightmares by giving you fine-grained control over access. IAM Concepts You Must Know Concept What It Means User A person or system that needs access (e.g., a developer or CI tool) Group A collection of users (e.g., all Devs in a “Developers” group) Role Temporary access for apps or services (e.g., Lambda, EC2, Strapi) Policy A set of rules (in JSON) that define what can be done and where   Example: A Simple Policy This IAM policy allows read-only access to a specific S3 bucket: { “Version”: “2012-10-17”, “Statement”: [{ “Effect”: “Allow”, “Action”: [“s3:GetObject”], “Resource”: “arn:aws:s3:::my-app-assets/*” }]} This means: “You can read any file inside the my-app-assets bucket — but you can’t upload or delete anything.” IAM Best Practices for Beginners Practice Why It Matters Use IAM Users Don’t use the root AWS account Group Users Easier permission management Apply Least Privilege Only give the permissions needed Use Roles for Apps Never hardcode credentials Use IAM Policy Simulator Test what a user or role can do Rotate Access Keys Regularly Helps prevent abuse if leaked   Tools to Help You with IAM AWS Console (Web UI) AWS CLI (Command Line) IAM Policy Generator – https://awspolicygen.s3.amazonaws.com/policygen.html IAM Access Analyzer – Checks for public or cross-account access IAM Policy Simulator – Simulates what a policy allows Conclusion IAM may feel intimidating at first, but it’s one of the most critical skills you can learn in AWS. As your cloud projects grow, so does the importance of security, visibility, and control. Start small: create users, apply policies, and gradually master the power of IAM. You’ll thank yourself later and so will your cloud bill. Related reads: How to Set Up an S3 Bucket on AWS (Best Practices for Beginners) How to Set Up AWS CLI and IAM for S3 Bucket Access (Beginner-Friendly Guide) How to Show Some Files from a Private S3 Bucket — While Keeping Others Hidden External resources: AWS Official Documentation  

Understanding AWS IAM: The Key to Cloud Security for Beginners Read More »