admin

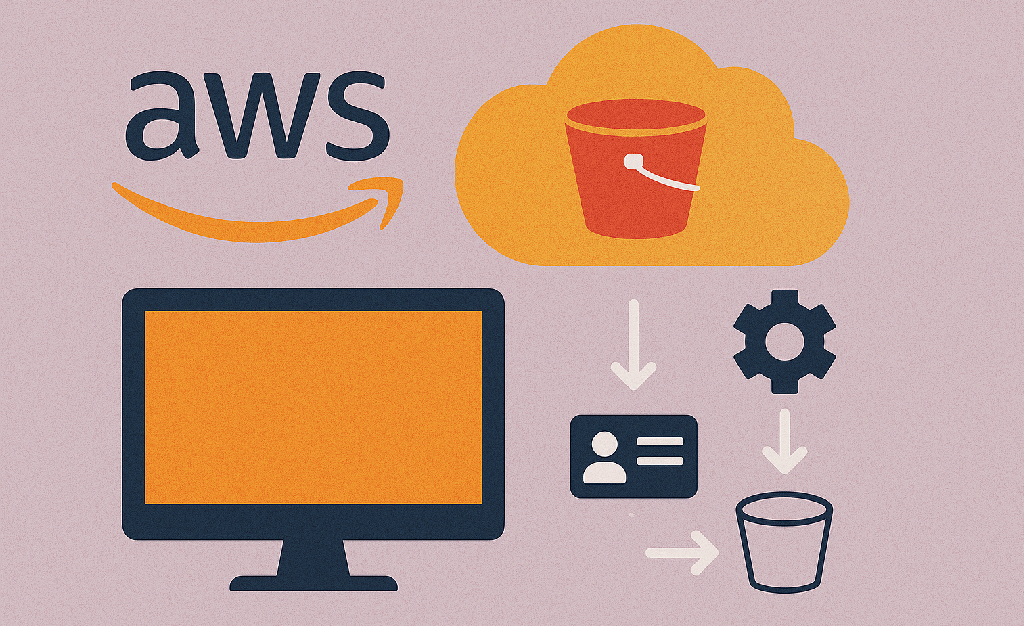
How to Set Up an S3 Bucket on AWS (Best Practices for Beginners)

When you first hear the term S3 bucket, it might sound a little technical. But if you’re working on any kind of web or mobile app, AWS S3 is one of the easiest and most powerful tools you can learn. In this post, we’ll walk you through what an S3 bucket is, how to set it up, and the best practices to keep your data secure, organized, and scalable — even if you’re just getting started with AWS. What Is an S3 Bucket? Amazon S3 (Simple Storage Service) is a service by AWS that allows you to store and retrieve files (called objects) such as: Images Videos Documents Backups Static websites An S3 bucket is simply a container where these files live — like a folder in the cloud. Step-by-Step: How to Create an S3 Bucket (the Right Way) 1. Log in to AWS Console Go to https://console.aws.amazon.com/s3 and log in with your AWS account. 2. Click “Create Bucket” Give your bucket a unique name (e.g. myapp-assets). Choose a region close to your users (e.g. US East, Europe West).         Best Practice: Bucket names should be: All lowercase Use hyphens (-) instead of spaces Avoid personal info or secrets 3. Block Public Access (HIGHLY Recommended) You don’t want your private files showing up in Google Search, right? Keep “Block all public access” checked unless your files are meant to be public (e.g., public images or a static site). Later, you can allow limited access to your app or specific users via IAM roles. 4. Enable Versioning Click to enable versioning. This lets you recover older versions of files if something is accidentally overwritten. 5. Turn on Encryption Protect your data — even if someone gets access to your bucket, encryption adds another layer. Choose SSE-S3 (Amazon manages keys for you). For more control, you can later use SSE-KMS (you manage the keys). 6. Organize with Folders (Prefixes) You can create “folders” to keep your files organized: /uploads/profile-pics//documents/invoices//videos/tutorials/ Tip: These aren’t real folders, but they help organize and manage your files easily. 7. Set Up a Lifecycle Rule (Optional but Smart) If you store logs, backups, or temporary files: Add a lifecycle rule to automatically delete or move files to cheaper storage after a few days or months. Examples: Move logs to Glacier after 30 days. Delete temporary files after 7 days. 8. Access Your Bucket via AWS CLI or SDK You can use the AWS CLI to upload/download files: aws s3 cp myfile.jpg s3://myapp-assets/uploads/ Or use the AWS SDK in your app to programmatically upload files. Keep It Secure: More Best Practices Practice Why It Matters Use IAM Roles Avoid sharing access keys Avoid Public Access Unless necessary for public files  Enable Logging Track who accesses your files Add CORS Rules (if needed) For frontend apps like React or Vue  Backup Critical Data Don’t rely on a single copy of anything    Bonus: Host a Static Website with S3 Want to host a portfolio or blog? Upload your index.html and other files. Enable Static Website Hosting in the bucket settings. Make files public (with caution). Access your site via the generated URL! Great for personal pages, landing pages, or documentation sites. Final Thoughts S3 is a must-have skill for any modern developer. Whether you’re storing images for your app or hosting a static website, it’s powerful and flexible — as long as you follow the best practices. By setting it up correctly from the start, you’ll avoid security issues, keep your data organized, and be ready to scale your app like a pro. Ready to Practice? Go ahead and create your first bucket! Need help with IAM roles, static site hosting, or connecting S3 with your mobile app? Drop a comment or reach out — happy to help.   Related reads: Understanding AWS IAM: The Key to Cloud Security for Beginners How to Set Up AWS CLI and IAM for S3 Bucket Access (Beginner-Friendly Guide) How to Show Some Files from a Private S3 Bucket — While Keeping Others Hidden External resources: AWS Official Documentation  

How to Set Up an S3 Bucket on AWS (Best Practices for Beginners) Read More »
Can’t SSH Into EC2? It Might Be the Firewall — Not What You Think

One of the more surprising EC2 issues I recently helped troubleshoot turned out to be a local firewall misconfiguration — not memory, not the instance crashing, and not AWS limits. At first, it seemed like the usual “can’t SSH into EC2” situation. However, what made this different was that everything else appeared fine: the security groups, key file, IP address, and even the instance’s health status. Let’s look at how I figured it out — and how you can fix it too. The Situation: EC2 Instance Running, but SSH Failing A friend reached out after suddenly losing SSH access to their previously working EC2 instance. They tried: ssh -i my-key.pem ec2-user@ec2-xx-xx-xx-xx.compute-1.amazonaws.com There was no response at all. They had: The correct key The right public IP Port 22 open in the security group An instance marked as running Everything should’ve worked, right? First Checks (That Didn’t Solve It) Naturally, we worked through the standard checklist: Inbound port 22 open in the EC2 security groupCorrect key and usernameCorrect IP address We even tried EC2 Instance Connect — still failed. The AWS Console showed the instance as healthy. So what was wrong? The Discovery: It Was UFW (Uncomplicated Firewall) Digging deeper, I asked, “Have you configured any firewall or security software inside the instance?” That’s when it clicked. The user had enabled UFW (a popular firewall tool on Ubuntu) during recent security hardening — but didn’t configure it to allow SSH. As a result, port 22 was blocked inside the server. The Fix: Reset the Firewall Rules Since AWS security groups couldn’t override the internal block, the instance became unreachable externally. Here’s how we fixed it: 1️⃣ Stop the EC2 InstanceStop it via AWS Console (don’t terminate!). 2️⃣ Detach the Root VolumeIn EBS, detach the volume from the instance. 3️⃣ Attach to Another InstanceAttach the volume to a working EC2 as a secondary disk (e.g., /dev/xvdf). 4️⃣ Mount the Volume  sudo mkdir /mnt/recovery sudo mount /dev/xvdf1 /mnt/recovery 5️⃣ Edit UFW Rules sudo chroot /mnt/recovery ufw allow ssh ufw disable # or correct the rules exit 6️⃣ Unmount & Reattach sudo umount /mnt/recovery Detach from the temporary instance and reattach to the original. 7️⃣ Start the InstanceBoot it up and SSH access should work! Lessons Learned AWS security groups manage external access, but internal firewalls like UFW can block you from the inside.Always whitelist SSH (port 22) before enabling firewalls on remote servers. Back up the instance or create an AMI snapshot prior to making security changes. Preventive Tip: Configure UFW Properly First  sudo ufw allow ssh sudo ufw enable   Conclusion SSH issues on EC2 aren’t always about AWS — sometimes it’s your own internal firewall. Related reads: Can’t SSH into Your EC2 Instance Even Though It’s Running? Here’s What You Should Check Other Topics: Checkout the link External resources: AWS Official Documentation AWS EC2 SSH Troubleshooting

Can’t SSH Into EC2? It Might Be the Firewall — Not What You Think Read More »

Can’t SSH into Your EC2 Instance Even Though It’s Running? Here’s What You Should Check

Deploying projects on AWS EC2 instances can be exciting — until something goes wrong. One of the most frustrating issues I recently faced was not being able to SSH into an EC2 instance that previously worked perfectly. The instance was marked as “running” on the AWS Console, yet SSH connections failed completely. If you’ve ever been in a similar situation, this blog post will walk you through what I experienced and what you should check when your EC2 instance is up but SSH isn’t working. The Problem: EC2 Running, SSH Not Working Everything was working fine I had access, I was developing, and then suddenly, SSH stopped responding. Here’s what I knew: The instance status was still showing as running on the AWS Console. No obvious alerts or errors were displayed. But when I tried to SSH:  ssh -i my-key.pem ec2-user@ec2-xx-xx-xx-xx.compute-1.amazonaws.com It just hung or timed out. What I Checked (and You Should Too) 1. Security Group Inbound Rules The first thing to check is whether port 22 (SSH) is open: Go to EC2 → Instances → Select your instance Scroll to Security Groups Ensure Inbound Rules have: Type: SSH Protocol: TCP Port Range: 22 Source: Anywhere (0.0.0.0/0) or your IP (for security) Even if the rules were working before, double-check — sometimes IP restrictions or accidental changes cause access issues. 2. Elastic IP or Public IP If your instance doesn’t have a static Elastic IP, it gets a new public IP every time it’s stopped and started. So: Confirm you’re SSHing into the correct current IP address Update your SSH command with the latest IP from the AWS Console 3. Key File (PEM) and Username Double-check: The PEM file name and path The correct user (e.g., ec2-user for Amazon Linux, ubuntu for Ubuntu) Wrong key or wrong user = no access. 4. Instance Storage/Memory Issues Sometimes, if your instance runs out of memory or disk, the OS may become unresponsive — SSH included — even though AWS shows it as “running.” In my case, I realized the instance was low on memory and had likely crashed at the OS level, but AWS still marked it as active. 5. Try EC2 Instance Connect (Browser-Based SSH) AWS provides EC2 Instance Connect, a browser-based SSH tool: Go to EC2 → Select Instance → Click Connect Try logging in with EC2 Instance Connect (doesn’t need your PEM file) If this also fails, it confirms the instance is non-responsive internally. What I Did Next After confirming my SSH key and IP were correct, and security rules were in place, I tried EC2 Instance Connect. No luck. I still couldn’t access the instance. At that point, I suspected a low memory crash or filesystem corruption. Since there was no way to SSH in or repair it from the outside, I: Created a snapshot of the volume Launched a new EC2 instance Attached the old volume to the new instance as a secondary disk Mounted it and copied over my project files and configurations Set up my environment again on the new instance It took time, but it worked. Real Tip: Set Up Monitoring and Backups To avoid future surprises: Enable CloudWatch monitoring for memory and disk Set up automatic daily snapshots Use Elastic IP to avoid IP changes Final Thoughts When you can’t SSH into your EC2 instance, but it appears to be running: Don’t panic. Check your security group, IP address, and key file. Try browser-based EC2 Instance Connect. If all else fails, recover your data using snapshots and move to a new instance. Related reads: Can’t SSH Into EC2? It Might Be the Firewall — Not What You Think Other Topics: Checkout the link External resources: AWS Official Documentation

Can’t SSH into Your EC2 Instance Even Though It’s Running? Here’s What You Should Check Read More »

strapi AWS free tier image

Why My Strapi Deployment Kept Failing: Lessons from the Free Tier Trap

Deploying a Strapi application should be straightforward — clone your repo, install dependencies, build the project, start the server, and you’re good to go. But what happens when you’ve done everything right, and the server still crashes, hangs, or simply gives you a white screen? That’s the frustrating experience I went through recently. Let me walk you through what happened, what I learned, and what you should absolutely check when deploying Strapi — especially if you’re doing it on a free-tier instance. The Setup I followed the standard process: Spun up an EC2 instance Installed Node.js, npm, and all required dependencies Cloned my Strapi project Built and started the app Everything seemed fine at first. But just when I thought I was done… The First Sign: The Instance Hung After finishing the setup and starting the Strapi server, the instance froze. No access via the browser. I couldn’t even ping the IP. When I tried to connect again, it was unresponsive. First thought? Security Group settings.I checked all the security group rules — they were open for the required ports (1337 for Strapi, 22 for SSH, etc.). Everything seemed perfect on that end. I tried re-adding the port for Strapi again, hoping something might reset. Still no progress. The Hunt for a Cause I started suspecting a memory issue. It’s not uncommon — Strapi is powerful, but it’s also resource-hungry. So I logged into the instance using SSH (thankfully that still worked) and started trying to free up space. Deleted unused files Checked running processes Killed unnecessary services But no matter what I did, Strapi still wouldn’t load properly — only a blank white screen in the browser. The Realization: Free Tier Limitations That’s when it hit me — I was using an EC2 free-tier instance (t2.micro). The problem wasn’t my code, or security groups, or even the OS. It was simply that the server didn’t have enough resources (CPU, RAM) to run Strapi effectively. The white screen was the result of the front-end admin panel timing out or not rendering at all due to insufficient power. The Fix: Upgrade the Instance To confirm my suspicion, I spun up a new instance — this time a t2.small (still relatively low-cost, but better than free-tier). I repeated the exact same setup process: Cloned the repo Installed Node and dependencies Built the project Started the server And it worked! Strapi loaded fine. The admin panel appeared, and I could log in, configure content types, and everything else I needed. Final Thoughts & What’s Next While t2.small worked, I noticed some minor sluggishness during production prep. So in my next test, I’ll try running the project on a t2.medium to ensure smooth performance under production load. Key Takeaways for Anyone Deploying Strapi Avoid free-tier instances for Strapi, especially t2.micro. They simply don’t have enough memory or CPU to handle the app, especially once you build it for production. Don’t assume it’s your code — sometimes the environment is the issue. Start with a small paid instance like t2.small or t2.medium for real-world testing. Monitor resources with tools like htop or top during deployment. Always SSH in to verify what’s happening, even if the browser shows a white screen. Next Up: Testing Strapi on t2.medium In the next article, I’ll share the results of running the production-ready version of Strapi on a t2.medium instance — including performance benchmarks, memory usage, and tips for optimizing your deployment even further. Have you faced similar issues deploying Strapi or any other headless CMS? Drop your experience in the comments let’s learn from each other! Related reads: Deploying Strapi on AWS EC2: A Comprehensive Guide Why I Recommend Strapi for Quick Development External resources: Strapi Official Documentation AWS Official Documentation

Why My Strapi Deployment Kept Failing: Lessons from the Free Tier Trap Read More »

php elephant on laptop

Is PHP Dead

Is PHP Dead? A Thoughtful Look at the Evolution of a Veteran Language When developers say a language is “dead,” they rarely mean that no one is using it. Instead, they often refer to its perceived relevance in modern development, community growth, innovation, or overall momentum in the tech landscape. So when the question arises, “Is PHP dead?” — it deserves a thoughtful, nuanced exploration rather than a simple yes or no. What Does “Dead” Mean in Tech? In technology, a language or tool is often considered “dead” when: It is no longer actively developed or maintained. It lacks a vibrant community or ecosystem. It’s not being adopted in new projects. It feels outdated or is losing mindshare to newer alternatives. However, this definition has its flaws. For example, COBOL is decades old and rarely used for new projects — yet it’s still running mission-critical systems in banks and governments. That doesn’t make it dead; it makes it legacy. The same nuance applies to PHP. Is PHP Still Being Used? Absolutely. PHP powers more than 75% of websites on the internet, including major platforms like WordPress, Drupal, and Magento. Facebook originally ran on PHP and still relies on it internally (albeit a heavily modified version called Hack). Platforms like: WordPress (which powers 40%+ of the web) Laravel (a modern PHP framework that is extremely popular) Symfony, CodeIgniter, and other frameworks show that PHP is not only used, but also thriving in certain areas. Why Developers Say PHP is “Dead” Despite its continued use, many developers refer to PHP as “dead” for several reasons: 1. Bad Reputation from the Past PHP, especially in its early versions, had major issues: Inconsistent syntax Poor security practices Spaghetti code common in beginner-written apps This led to a reputation that’s been hard to shake off, despite improvements. 2. Rise of JavaScript and Node.js The explosion of JavaScript (with Node.js, React, etc.) gave rise to full-stack JavaScript apps. Developers found it easier to use one language for both front and back end. 3. Modern Alternatives Languages like Python (with Django/Flask), Ruby (with Rails), and even Go and Rust have gained popularity for their performance, cleaner syntax, and modern design patterns. 4. Lack of Innovation Perception Compared to fast-moving ecosystems like JavaScript or Python, PHP feels slower to evolve — even though PHP 8 introduced great features like JIT compilation and type safety. Why PHP Is Still Very Much Alive Despite the criticism, PHP continues to improve and grow. 1. Massive User Base Because of WordPress, PHP is likely the first backend language many developers still encounter. It dominates small business websites, blogs, and even e-commerce. 2. Modern Frameworks (Laravel) Laravel, one of the most elegant and modern PHP frameworks, brought structure, simplicity, and beauty back to PHP development. Its ecosystem rivals that of any modern backend framework. 3. Performance Improvements PHP 8 and 8.1 brought major performance and syntax improvements. Features like union types, attributes, and the JIT compiler make PHP more capable than ever. 4. Easy to Learn, Fast to Deploy PHP is still one of the easiest languages to get started with. You can spin up a PHP server with minimal configuration, which is attractive for beginners and small projects. 5. Robust Hosting Support PHP is supported out-of-the-box by nearly every web hosting provider, making it the go-to for quick deployments and shared hosting environments. Conclusion: PHP Isn’t Dead — It’s Just Mature Calling PHP “dead” is both inaccurate and unfair. It may not be the trendiest language on the block, but it has matured into a solid, reliable, and modern language that powers a huge part of the web. Developers might move to shinier tools, but PHP remains an essential part of the internet’s infrastructure. Like a veteran craftsman, it may not flash the latest trends, but it gets the job done — reliably, securely, and at scale. So is PHP dead? No. It’s alive, stable, and quietly powering the backbone of the internet while the world debates its relevance.  

Is PHP Dead Read More »

Strapi blog featured image

Deploying Strapi on AWS EC2: A Comprehensive Guide

Strapi is a powerful, open-source headless CMS built on Node.js that helps you manage content and deliver it via API. Deploying it to production requires a reliable server—AWS EC2 fits that need perfectly, offering flexibility, scalability, and global reach. In this guide, you’ll learn how to deploy Strapi on Ubuntu EC2, set up a secure PostgreSQL database (via RDS), and configure S3 for storing media assets. 1. Prepare and Launch Your EC2 Instance  Open the AWS Console and navigate to EC2. Choose a modern region (e.g., us-east-1). Click Launch Instance, select Ubuntu Server 22.04 LTS. Choose an instance type (t2.small recommended; 2 GB RAM is ideal) Configure storage (20–32 GB SSD is a good starting point). Add a Security Group: SSH (port 22) from your IP HTTP (80) and HTTPS (443) from anywhere Optionally, TCP 1337 for testing locally (remove later) Create or select a key pair (.pem file). After review, launch the instance. Save your .pem key in a safe, accessible location and this pem key will be used to ssh into the instance.    2. Connect and Prepare the Server Once your instance starts: ssh -i ~/path/my-strapi.pem ubuntu@<EC2_PUBLIC_IP>sudo apt update && sudo apt upgrade -y Then install essentials: # Install Node.js v18 via nvmcurl -fsSL https://deb.nodesource.com/setup_18.x | sudo -E bash -sudo apt install -y nodejs build-essential git nginx pm2 We use nvm/Node18 (Strapi requires Active LTS) PM2 ensures Strapi restarts on failures or server reboot. 3. Deploy Your Strapi App A. Clone Your Code git clone https://github.com/you/your-strapi-project.gitcd your-strapi-projectnpm install B. Setup Environment Variables Create .env with:  HOST=0.0.0.0PORT=1337NODE_ENV=productionDATABASE_CLIENT=postgresDATABASE_HOST=<YOUR_RDS_ENDPOINT>DATABASE_PORT=5432DATABASE_NAME=strapiDATABASE_USERNAME=<DB_USER>DATABASE_PASSWORD=<DB_PASS>AWS_ACCESS_KEY_ID=<KEY>AWS_ACCESS_SECRET=<SECRET>AWS_REGION=us-east-1AWS_BUCKET_NAME=<S3_BUCKET> 4. Configure the Database (RDS) Strapi’s default is SQLite—not ideal for production. Use AWS RDS with PostgreSQL or MariaDB  Go to RDS, create a PostgreSQL database. Disable public access. Attach the EC2 Security Group to allow only the Strapi server’s IP  Configure Strapi for Production goto the config folder in your strapi project config/env/production/database.js:  module.exports = ({ env }) => ({ connection: { client: ‘postgres’, connection: { host: env(‘DATABASE_HOST’), port: env.int(‘DATABASE_PORT’), database: env(‘DATABASE_NAME’), user: env(‘DATABASE_USERNAME’), password: env(‘DATABASE_PASSWORD’), ssl: { rejectUnauthorized: false }, }, debug: false, },}); Install the Postgres driver: npm install pg pg-connection-string   5. Setup S3 for Media Uploads  Strapi saves uploads locally by default, which isn’t suitable for production  Steps: Create an S3 bucket. Attach correct IAM policies to your EC2 role (or use access keys). Install the AWS provider: npm install @strapi/provider-upload-aws-s3 Create config/env/production/plugins.js:  module.exports = ({ env }) => ({ upload: { config: { provider: ‘aws-s3’, providerOptions: { region: env(‘AWS_REGION’), params: { Bucket: env(‘AWS_BUCKET_NAME’) }, }, }, },}); Your media assets will now be stored securely in S3.   6. Manage the Process with PM2 Install and configure PM2:  npm install pm2 -gpm2 start npm –name strapi — startpm2 savepm2 startup systemd This ensures Strapi starts on reboot   7. Set Up Nginx as a Reverse Proxy Nginx secures your Strapi instance and enables HTTPS: Install Certbot: sudo apt install certbot python3-certbot-nginx Configure Nginx:  server { listen 80; server_name cms.yourdomain.com; return 301 https://$host$request_uri;}server { listen 443 ssl; server_name cms.yourdomain.com; ssl_certificate /etc/letsencrypt/live/cms.yourdomain.com/fullchain.pem; ssl_certificate_key /etc/letsencrypt/live/cms.yourdomain.com/privkey.pem; location / { proxy_pass http://localhost:1337; proxy_http_version 1.1; proxy_set_header Upgrade $http_upgrade; proxy_set_header Connection ‘upgrade’; proxy_set_header Host $host; }} Reload Nginx: sudo nginx -t && sudo systemctl restart nginxsudo certbot –nginx -d cms.yourdomain.com Now your Strapi is live at https://cms.yourdomain.com, secure with HTTPS.   8. Secure and Optimize Close direct port 1337 access in the Security Group Use AWS CloudWatch for logs and performance monitoring Use SSM Parameter Store or AWS Secrets Manager to manage secrets securely Regularly run npm audit and update dependencies . Consider enabling rate-limiting and strong Content Security Policy (CSP).   9. Cost and Maintenance Notes A t2.small EC2 instance + RDS + S3 generally costs $30–40/month for light workloads Pay attention to instance type—free-tier micro instances often lack memory to run Strapi    Final Note Deploying Strapi on AWS EC2 + RDS + S3 gives you a scalable, secure, production-ready CMS. You’ll learn valuable DevOps skills as you: Launch and secure an EC2 server Configure node with PM2 and environment variables Set up a managed PostgreSQL database (RDS) Store media assets in S3 Reverse-proxy traffic through Nginx with HTTPS Monitor performance in CloudWatch Once you have this foundation, you can easily scale out with load-balancers, containerization (ECS/EKS), or automated deployments.   Related reads: Why I Recommend Strapi for Quick Development Why My Strapi Deployment Kept Failing: Lessons from the Free Tier Trap External resources: Strapi Official Documentation AWS Official Documentation

Deploying Strapi on AWS EC2: A Comprehensive Guide Read More »

Working with Docker

What is Docker? Why Developers Love It (And You Should Too) In modern software development, agility, consistency, and scalability are crucial. That’s where Docker comes in — a powerful tool that’s essential for developers, DevOps engineers, and testers. If you’ve ever heard someone say, “It works on my machine!” only to watch it fail in production, Docker solves that exact problem. Related read:Is PHP Dead? |Which do you prefer php or NodeJs Learn more at: Docker Documentation. What is Docker? Docker is an open-source platform that lets developers package applications and all their dependencies into a container — a lightweight, standalone executable that runs consistently across any environment. Think of a container as a mini-computer inside your computer, built to run one app and everything it needs. How Docker Works Docker uses a client-server architecture: Dockerfile: Script defining your container’s base image, code, dependencies, and commands. Docker Image: Snapshot of the app + environment, built from the Dockerfile. Docker Container: Running instance of a Docker image. Docker Engine: The runtime that builds and manages containers. Example workflow   # Step 1: Write a DockerfileFROM node:18WORKDIR /appCOPY package*.json ./RUN npm installCOPY . .CMD [“npm”, “start”] # Step 2: Build an imagedocker build -t my-node-app . # Step 3: Run the containerdocker run -p 3000:3000 my-node-app Boom — your app is running in an isolated container, ready to deploy anywhere. What Problems Does Docker Solve? Here’s where Docker shines: ✅ “It works on my machine” syndrome — Consistency across dev, test, prod.✅ Dependency hell — Each container holds its own versions.✅ Slow onboarding — Share the Docker image; no extra setup.✅ Complex deployments — Simplifies CI/CD pipelines.✅ Heavy virtual machines — Containers are faster, lighter, and use fewer resources. Why Developers Recommend Docker Docker helps developers: Repeat builds identically on any machine Run services modularly (frontend, backend, DB in separate containers) Spin up test environments quickly Deploy faster with fewer bugs Work cloud-ready (compatible with Kubernetes, serverless, etc.) Final Thoughts Docker isn’t just a developer trend — it’s a foundational tool for modern software development. Whether you’re building microservices, a monolith, or experimenting with AI models, Docker helps you move faster, with fewer bugs and greater confidence. 👉 If you haven’t tried Docker, now’s the time. Your future self will thank you. Related read:Is PHP Dead? |Which do you prefer php or NodeJs Learn more at: Docker Official Documentation.  

Working with Docker Read More »

Which do you prefer php or NodeJs

PHP vs Node.js – Which Should You Use (and Why I Choose Node.js) When building modern web applications, two powerful backend technologies often come into the conversation: PHP and Node.js. In this post, we’ll compare PHP vs Node.js, explore their strengths, and help you decide which is best for your project. If you’re also wondering “Is PHP Dead” in today’s tech landscape, we covered that too! A Quick Comparison of PHP vs Node.js Feature PHP Node.js Language PHP JavaScript Runtime Interpreted server-side Event-driven, non-blocking JS Speed Slower for concurrent tasks Fast, especially under load Hosting Shared hosting ready Requires VPS or Node-ready host Learning Curve Easier for beginners Steeper, especially with async Community Support Huge legacy community Large, modern ecosystem Frameworks Laravel, Symfony Express.js, NestJS   If you’re setting up a server, check out our post on Nginx vs Apache: Which Web Server Should You Use? to choose the right web server for your stack. Why I Prefer Node.js Single Language Across the Stack With Node.js, developers write JavaScript for both frontend and backend, creating cleaner code sharing and better team collaboration. Modern Development Flow Node.js excels with tools like NPM, ES Modules, TypeScript, and Socket.io for real-time apps — perfect for startups and chat-based platforms. Performance Node.js shines for apps needing real-time updates or concurrent processing. Unlike PHP, it handles multiple I/O operations efficiently. When PHP Might Be Better PHP still shines in cases like: WordPress or Drupal sites Shared hosting environments Quick CRUD apps If you want to learn PHP from the source, visit the official docs at PHP.net. Conclusion: Choose What Solves Your Problem Best Both PHP and Node.js are production-ready. For speed, scalability, and modern workflows, I prefer Node.js — but PHP is still great for certain use cases. If you’re curious about containers, also explore Working with Docker. Ready to choose? Weigh the strengths of PHP vs Node.js based on your project’s needs, and check out more practical guides on our Blidot Blog.

Which do you prefer php or NodeJs Read More »