AWS

cloud services aws azure gcp and etc image

Choosing the Right Cloud Service: A Developer’s Guide to AWS, Azure, GCP & More

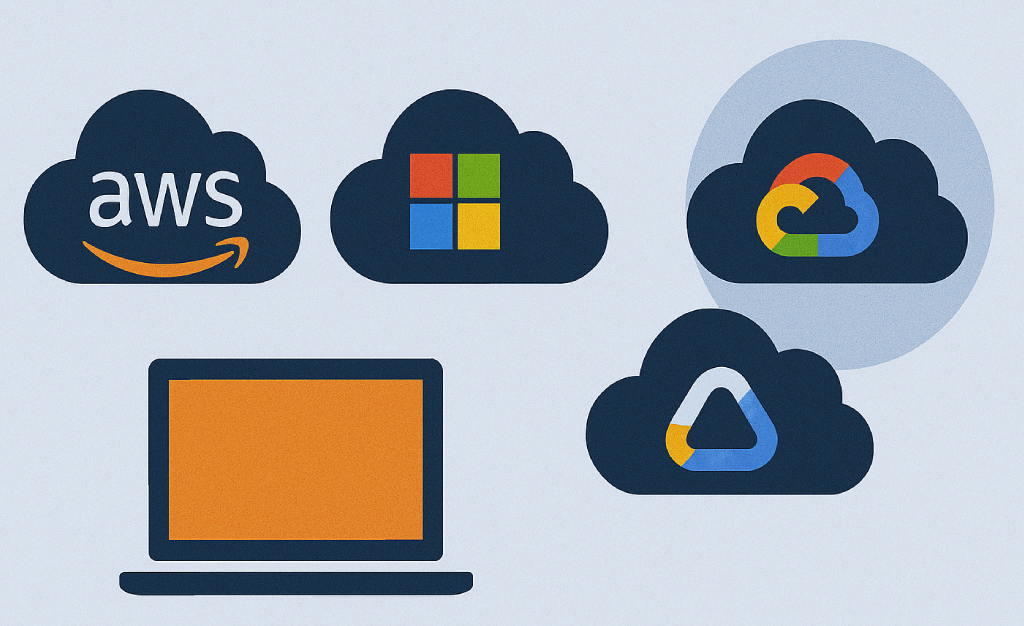
In today’s fast-moving digital world, cloud computing isn’t just a luxury — it’s a necessity. Whether you’re building a startup MVP, managing enterprise infrastructure, or launching the next viral app, your choice of cloud provider can make or break your project. With several powerful platforms on the market, how do you know which one is best for your needs? This guide breaks down the leading cloud services — AWS, Azure, GCP, DigitalOcean, and more — and compares them across key areas like pricing, scalability, performance, and usability. What Are Cloud Services? Cloud services provide on-demand computing resources such as servers, databases, storage, and networking — all accessible over the internet. Instead of purchasing and maintaining physical servers, you “rent” exactly what you need and scale up or down as your requirements change. Top Cloud Platforms at a Glance Here’s a quick overview of the most popular cloud providers trusted by developers and enterprises worldwide: Cloud Provider Best Known For Amazon Web Services (AWS) Broadest set of services & global reach Microsoft Azure Integration with Microsoft ecosystem Google Cloud Platform (GCP) Big data, ML, and Kubernetes expertise IBM Cloud Enterprise hybrid solutions & AI Oracle Cloud Databases and ERP systems DigitalOcean Simplicity and developer-first design Linode (Akamai) Transparent, affordable cloud compute Alibaba Cloud Asia’s top provider, great for commerce   Comparison Table Feature AWS Azure GCP DigitalOcean IBM Cloud Ease of Use Medium Medium Friendly Very Easy Medium Pricing Pay-as-you-go Competitive Flexible Flat-rate Enterprise Free Tier Yes Yes Yes Yes Yes (Lite) Compute Services EC2, Lambda VMs, Functions Compute Engine Droplets Bare Metal Storage Options S3, Glacier Blob Storage Cloud Storage Spaces (S3 API) Object, Block Database Services RDS, DynamoDB SQL, CosmosDB Firestore, BigQuery Managed SQL Db2, PostgreSQL AI/ML Tools SageMaker Azure ML Vertex AI Basic APIs Watson AI Best For Scale Enterprise AI/Data Startups Regulated Industries   How to Choose: Deep Dive by Use Case Choose AWS if you need global scale, advanced cloud tools, or enterprise-grade compute flexibility. It’s a favorite among large-scale startups and infrastructure-heavy systems. Go with Azure if your team relies on Microsoft tools like Office 365, .NET, or Active Directory. It’s also a smart pick for hybrid cloud needs. Pick GCP if your app is data-intensive or AI-driven. Google’s cloud excels in Kubernetes support and data analytics tooling. Select DigitalOcean if you’re a solo founder, startup, or agile team that values simplicity, transparent pricing, and quick deployments. Try IBM Cloud if you’re in a regulated sector like healthcare or finance, or need enterprise AI via Watson. Should You Use Multi-Cloud? Absolutely — and many companies already do. A multi-cloud approach allows you to: Prevent vendor lock-in Balance cost across providers Combine the best tools from each ecosystem (e.g., AWS compute + GCP ML) While it adds complexity, multi-cloud strategies can offer great flexibility if you manage them well. Final Thoughts There’s no universal “best” cloud provider. Your choice depends on your tech stack, team size, budget, and long-term goals. Here’s a quick recap: Choose AWS for scalability and flexibility. Use Azure if your team is Microsoft-heavy. Try GCP for data-driven or AI projects. Pick DigitalOcean for speed and simplicity. Explore IBM Cloud for compliance-heavy industries. Still unsure? Start small, test each platform’s free tier, and grow as your project evolves. Reads also: Who Is a DevOps Engineer? Understanding the Role Behind Smooth Software Delivery What Is DevOps? A Simple Explanation for Developers, Teams & Startups External resources: AWS Official Website Microsoft Azure Official Website Google Cloud Platform (GCP) Official Website

Choosing the Right Cloud Service: A Developer’s Guide to AWS, Azure, GCP & More Read More »
How to setup aws cli iam and s3 bucket

How to Set Up AWS CLI and IAM for S3 Bucket Access (Beginner-Friendly Guide)

If you’re building a web or mobile app and want to use AWS S3 to store images, files, or documents, learning how to set up the AWS CLI and IAM is a critical first step. In this guide, we’ll break it down step-by-step  no prior AWS experience required. What You’ll Learn  How to install and configure the AWS CLI How to create an IAM user with S3 permissions How to connect the CLI to your IAM user How to test S3 access using CLI commands Step 1: Install the AWS CLI The AWS CLI (Command Line Interface) allows you to control AWS from your terminal. Navitagate to this URL https://docs.aws.amazon.com/cli/latest/userguide/getting-started-install.html then scroll to AWS CLI install and update instructions For installation instructions, expand the section for your operating system. You will see 3 Operating Systems MacOS, Linux and Windows. In this tutorial we going to focus on the installion on the MacOS.  When u click on the MacOS panel u will the instructions Install and update requirements and Install or update the AWS CLI On Install or update the AWS CLI You are going to see 3 Horizonal tabs with labels GUI installer, Command line Installer – all users and Command line – Current user.  So we going to go with the Gui Installer you follow the process by downloading with this link In your browser, download the macOS pkg file: https://awscli.amazonaws.com/AWSCLIV2.pkg  and once its is downloaded. Open the pkg file and follow the prompt to install the AWS Cli.  Step 2: Create an IAM User in AWS Go to IAM Console Click Users > Add user Username: my-s3-user Select Programmatic access Click Next: Permissions Choose Attach policies directly Search for and select: AmazonS3FullAccess (or custom policy — see below) Optional (Best Practice): Create a custom policy that limits access to one bucket only. Example Custom IAM Policy (Write Access to One Bucket)  { “Version”: “2012-10-17”, “Statement”: [ { “Effect”: “Allow”, “Action”: [“s3:PutObject”, “s3:GetObject”], “Resource”: “arn:aws:s3:::my-app-bucket/*” } ]} Apply this if you want more control over your app’s security. Step 3: Save Access Credentials After creating the user: AWS will give you an Access Key ID and a Secret Access Key Copy and save these securely (you won’t see the secret again!) Step 4: Configure the AWS CLI with IAM Credentials Open your terminal and type aws configure You’ll be prompted for: AWS Access Key ID: xxxxxxxxxxxxxxxxxAWS Secret Access Key: xxxxxxxxxxxxxxxxxxxxxDefault region name [e.g. us-east-1]: us-east-1Default output format [json]: json  This saves your credentials to ~/.aws/credentials. Step 5: Test S3 Access from the CLI Upload a file:  aws s3 cp my-image.jpg s3://my-app-bucket/uploads/my-image.jpg   Download a file:  aws s3 cp s3://my-app-bucket/uploads/my-image.jpg ./downloaded.jpg   List files: aws s3 ls s3://my-app-bucket/uploads/    Best Practices for IAM + AWS CLI Best Practice Why It Matters Don’t use root account credentials Too powerful, not secure Use separate IAM users for each app Easier to track and revoke Limit access to only what’s needed Follows the “least privilege” rule Rotate keys regularly Reduces risk if exposed Use IAM roles for servers/apps More secure than hardcoding keys    Recap Now you know how to: Install and set up AWS CLI Create a secure IAM user Grant S3 access via policy Upload and download files via the CLI With this foundation, you can easily integrate S3 into your web, mobile, or backend app securely. Related reads: How to Set Up an S3 Bucket on AWS (Best Practices for Beginners) Understanding AWS IAM: The Key to Cloud Security for Beginners How to Show Some Files from a Private S3 Bucket — While Keeping Others Hidden External resources: AWS Official Documentation  

How to Set Up AWS CLI and IAM for S3 Bucket Access (Beginner-Friendly Guide) Read More »

understanding AWS IAM image

Understanding AWS IAM: The Key to Cloud Security for Beginners

If you’re getting into cloud computing with AWS, one of the most important — and often most misunderstood — concepts is IAM, short for Identity and Access Management. Whether you’re a developer, DevOps engineer, or a curious beginner, this post will help you understand what IAM is, why it’s critical, and how to use it securely in your AWS projects. What is IAM? IAM (Identity and Access Management) is the gatekeeper of AWS. It controls: Who can log in to your AWS account What they can do (read, write, delete, etc.) Which resources they can access (S3, EC2, DynamoDB, etc.) Think of it as your cloud security team, working 24/7. Why IAM Matters AWS is incredibly powerful — but with great power comes great responsibility. Without IAM, anyone with access to your account could: Delete your S3 bucketsExpose sensitive dataRun up huge bills by launching expensive services IAM helps you avoid these nightmares by giving you fine-grained control over access. IAM Concepts You Must Know Concept What It Means User A person or system that needs access (e.g., a developer or CI tool) Group A collection of users (e.g., all Devs in a “Developers” group) Role Temporary access for apps or services (e.g., Lambda, EC2, Strapi) Policy A set of rules (in JSON) that define what can be done and where   Example: A Simple Policy This IAM policy allows read-only access to a specific S3 bucket: { “Version”: “2012-10-17”, “Statement”: [{ “Effect”: “Allow”, “Action”: [“s3:GetObject”], “Resource”: “arn:aws:s3:::my-app-assets/*” }]} This means: “You can read any file inside the my-app-assets bucket — but you can’t upload or delete anything.” IAM Best Practices for Beginners Practice Why It Matters Use IAM Users Don’t use the root AWS account Group Users Easier permission management Apply Least Privilege Only give the permissions needed Use Roles for Apps Never hardcode credentials Use IAM Policy Simulator Test what a user or role can do Rotate Access Keys Regularly Helps prevent abuse if leaked   Tools to Help You with IAM AWS Console (Web UI) AWS CLI (Command Line) IAM Policy Generator – https://awspolicygen.s3.amazonaws.com/policygen.html IAM Access Analyzer – Checks for public or cross-account access IAM Policy Simulator – Simulates what a policy allows Conclusion IAM may feel intimidating at first, but it’s one of the most critical skills you can learn in AWS. As your cloud projects grow, so does the importance of security, visibility, and control. Start small: create users, apply policies, and gradually master the power of IAM. You’ll thank yourself later and so will your cloud bill. Related reads: How to Set Up an S3 Bucket on AWS (Best Practices for Beginners) How to Set Up AWS CLI and IAM for S3 Bucket Access (Beginner-Friendly Guide) How to Show Some Files from a Private S3 Bucket — While Keeping Others Hidden External resources: AWS Official Documentation  

Understanding AWS IAM: The Key to Cloud Security for Beginners Read More »

How to Set Up an S3 Bucket on AWS (Best Practices for Beginners)

When you first hear the term S3 bucket, it might sound a little technical. But if you’re working on any kind of web or mobile app, AWS S3 is one of the easiest and most powerful tools you can learn. In this post, we’ll walk you through what an S3 bucket is, how to set it up, and the best practices to keep your data secure, organized, and scalable — even if you’re just getting started with AWS. What Is an S3 Bucket? Amazon S3 (Simple Storage Service) is a service by AWS that allows you to store and retrieve files (called objects) such as: Images Videos Documents Backups Static websites An S3 bucket is simply a container where these files live — like a folder in the cloud. Step-by-Step: How to Create an S3 Bucket (the Right Way) 1. Log in to AWS Console Go to https://console.aws.amazon.com/s3 and log in with your AWS account. 2. Click “Create Bucket” Give your bucket a unique name (e.g. myapp-assets). Choose a region close to your users (e.g. US East, Europe West).         Best Practice: Bucket names should be: All lowercase Use hyphens (-) instead of spaces Avoid personal info or secrets 3. Block Public Access (HIGHLY Recommended) You don’t want your private files showing up in Google Search, right? Keep “Block all public access” checked unless your files are meant to be public (e.g., public images or a static site). Later, you can allow limited access to your app or specific users via IAM roles. 4. Enable Versioning Click to enable versioning. This lets you recover older versions of files if something is accidentally overwritten. 5. Turn on Encryption Protect your data — even if someone gets access to your bucket, encryption adds another layer. Choose SSE-S3 (Amazon manages keys for you). For more control, you can later use SSE-KMS (you manage the keys). 6. Organize with Folders (Prefixes) You can create “folders” to keep your files organized: /uploads/profile-pics//documents/invoices//videos/tutorials/ Tip: These aren’t real folders, but they help organize and manage your files easily. 7. Set Up a Lifecycle Rule (Optional but Smart) If you store logs, backups, or temporary files: Add a lifecycle rule to automatically delete or move files to cheaper storage after a few days or months. Examples: Move logs to Glacier after 30 days. Delete temporary files after 7 days. 8. Access Your Bucket via AWS CLI or SDK You can use the AWS CLI to upload/download files: aws s3 cp myfile.jpg s3://myapp-assets/uploads/ Or use the AWS SDK in your app to programmatically upload files. Keep It Secure: More Best Practices Practice Why It Matters Use IAM Roles Avoid sharing access keys Avoid Public Access Unless necessary for public files  Enable Logging Track who accesses your files Add CORS Rules (if needed) For frontend apps like React or Vue  Backup Critical Data Don’t rely on a single copy of anything    Bonus: Host a Static Website with S3 Want to host a portfolio or blog? Upload your index.html and other files. Enable Static Website Hosting in the bucket settings. Make files public (with caution). Access your site via the generated URL! Great for personal pages, landing pages, or documentation sites. Final Thoughts S3 is a must-have skill for any modern developer. Whether you’re storing images for your app or hosting a static website, it’s powerful and flexible — as long as you follow the best practices. By setting it up correctly from the start, you’ll avoid security issues, keep your data organized, and be ready to scale your app like a pro. Ready to Practice? Go ahead and create your first bucket! Need help with IAM roles, static site hosting, or connecting S3 with your mobile app? Drop a comment or reach out — happy to help.   Related reads: Understanding AWS IAM: The Key to Cloud Security for Beginners How to Set Up AWS CLI and IAM for S3 Bucket Access (Beginner-Friendly Guide) How to Show Some Files from a Private S3 Bucket — While Keeping Others Hidden External resources: AWS Official Documentation  

How to Set Up an S3 Bucket on AWS (Best Practices for Beginners) Read More »

Can’t SSH Into EC2? It Might Be the Firewall — Not What You Think

One of the more surprising EC2 issues I recently helped troubleshoot turned out to be a local firewall misconfiguration — not memory, not the instance crashing, and not AWS limits. At first, it seemed like the usual “can’t SSH into EC2” situation. However, what made this different was that everything else appeared fine: the security groups, key file, IP address, and even the instance’s health status. Let’s look at how I figured it out — and how you can fix it too. The Situation: EC2 Instance Running, but SSH Failing A friend reached out after suddenly losing SSH access to their previously working EC2 instance. They tried: ssh -i my-key.pem ec2-user@ec2-xx-xx-xx-xx.compute-1.amazonaws.com There was no response at all. They had: The correct key The right public IP Port 22 open in the security group An instance marked as running Everything should’ve worked, right? First Checks (That Didn’t Solve It) Naturally, we worked through the standard checklist: Inbound port 22 open in the EC2 security groupCorrect key and usernameCorrect IP address We even tried EC2 Instance Connect — still failed. The AWS Console showed the instance as healthy. So what was wrong? The Discovery: It Was UFW (Uncomplicated Firewall) Digging deeper, I asked, “Have you configured any firewall or security software inside the instance?” That’s when it clicked. The user had enabled UFW (a popular firewall tool on Ubuntu) during recent security hardening — but didn’t configure it to allow SSH. As a result, port 22 was blocked inside the server. The Fix: Reset the Firewall Rules Since AWS security groups couldn’t override the internal block, the instance became unreachable externally. Here’s how we fixed it: 1️⃣ Stop the EC2 InstanceStop it via AWS Console (don’t terminate!). 2️⃣ Detach the Root VolumeIn EBS, detach the volume from the instance. 3️⃣ Attach to Another InstanceAttach the volume to a working EC2 as a secondary disk (e.g., /dev/xvdf). 4️⃣ Mount the Volume  sudo mkdir /mnt/recovery sudo mount /dev/xvdf1 /mnt/recovery 5️⃣ Edit UFW Rules sudo chroot /mnt/recovery ufw allow ssh ufw disable # or correct the rules exit 6️⃣ Unmount & Reattach sudo umount /mnt/recovery Detach from the temporary instance and reattach to the original. 7️⃣ Start the InstanceBoot it up and SSH access should work! Lessons Learned AWS security groups manage external access, but internal firewalls like UFW can block you from the inside.Always whitelist SSH (port 22) before enabling firewalls on remote servers. Back up the instance or create an AMI snapshot prior to making security changes. Preventive Tip: Configure UFW Properly First  sudo ufw allow ssh sudo ufw enable   Conclusion SSH issues on EC2 aren’t always about AWS — sometimes it’s your own internal firewall. Related reads: Can’t SSH into Your EC2 Instance Even Though It’s Running? Here’s What You Should Check Other Topics: Checkout the link External resources: AWS Official Documentation AWS EC2 SSH Troubleshooting

Can’t SSH Into EC2? It Might Be the Firewall — Not What You Think Read More »

Can’t SSH into Your EC2 Instance Even Though It’s Running? Here’s What You Should Check

Deploying projects on AWS EC2 instances can be exciting — until something goes wrong. One of the most frustrating issues I recently faced was not being able to SSH into an EC2 instance that previously worked perfectly. The instance was marked as “running” on the AWS Console, yet SSH connections failed completely. If you’ve ever been in a similar situation, this blog post will walk you through what I experienced and what you should check when your EC2 instance is up but SSH isn’t working. The Problem: EC2 Running, SSH Not Working Everything was working fine I had access, I was developing, and then suddenly, SSH stopped responding. Here’s what I knew: The instance status was still showing as running on the AWS Console. No obvious alerts or errors were displayed. But when I tried to SSH:  ssh -i my-key.pem ec2-user@ec2-xx-xx-xx-xx.compute-1.amazonaws.com It just hung or timed out. What I Checked (and You Should Too) 1. Security Group Inbound Rules The first thing to check is whether port 22 (SSH) is open: Go to EC2 → Instances → Select your instance Scroll to Security Groups Ensure Inbound Rules have: Type: SSH Protocol: TCP Port Range: 22 Source: Anywhere (0.0.0.0/0) or your IP (for security) Even if the rules were working before, double-check — sometimes IP restrictions or accidental changes cause access issues. 2. Elastic IP or Public IP If your instance doesn’t have a static Elastic IP, it gets a new public IP every time it’s stopped and started. So: Confirm you’re SSHing into the correct current IP address Update your SSH command with the latest IP from the AWS Console 3. Key File (PEM) and Username Double-check: The PEM file name and path The correct user (e.g., ec2-user for Amazon Linux, ubuntu for Ubuntu) Wrong key or wrong user = no access. 4. Instance Storage/Memory Issues Sometimes, if your instance runs out of memory or disk, the OS may become unresponsive — SSH included — even though AWS shows it as “running.” In my case, I realized the instance was low on memory and had likely crashed at the OS level, but AWS still marked it as active. 5. Try EC2 Instance Connect (Browser-Based SSH) AWS provides EC2 Instance Connect, a browser-based SSH tool: Go to EC2 → Select Instance → Click Connect Try logging in with EC2 Instance Connect (doesn’t need your PEM file) If this also fails, it confirms the instance is non-responsive internally. What I Did Next After confirming my SSH key and IP were correct, and security rules were in place, I tried EC2 Instance Connect. No luck. I still couldn’t access the instance. At that point, I suspected a low memory crash or filesystem corruption. Since there was no way to SSH in or repair it from the outside, I: Created a snapshot of the volume Launched a new EC2 instance Attached the old volume to the new instance as a secondary disk Mounted it and copied over my project files and configurations Set up my environment again on the new instance It took time, but it worked. Real Tip: Set Up Monitoring and Backups To avoid future surprises: Enable CloudWatch monitoring for memory and disk Set up automatic daily snapshots Use Elastic IP to avoid IP changes Final Thoughts When you can’t SSH into your EC2 instance, but it appears to be running: Don’t panic. Check your security group, IP address, and key file. Try browser-based EC2 Instance Connect. If all else fails, recover your data using snapshots and move to a new instance. Related reads: Can’t SSH Into EC2? It Might Be the Firewall — Not What You Think Other Topics: Checkout the link External resources: AWS Official Documentation

Can’t SSH into Your EC2 Instance Even Though It’s Running? Here’s What You Should Check Read More »

Strapi blog featured image

Deploying Strapi on AWS EC2: A Comprehensive Guide

Strapi is a powerful, open-source headless CMS built on Node.js that helps you manage content and deliver it via API. Deploying it to production requires a reliable server—AWS EC2 fits that need perfectly, offering flexibility, scalability, and global reach. In this guide, you’ll learn how to deploy Strapi on Ubuntu EC2, set up a secure PostgreSQL database (via RDS), and configure S3 for storing media assets. 1. Prepare and Launch Your EC2 Instance  Open the AWS Console and navigate to EC2. Choose a modern region (e.g., us-east-1). Click Launch Instance, select Ubuntu Server 22.04 LTS. Choose an instance type (t2.small recommended; 2 GB RAM is ideal) Configure storage (20–32 GB SSD is a good starting point). Add a Security Group: SSH (port 22) from your IP HTTP (80) and HTTPS (443) from anywhere Optionally, TCP 1337 for testing locally (remove later) Create or select a key pair (.pem file). After review, launch the instance. Save your .pem key in a safe, accessible location and this pem key will be used to ssh into the instance.    2. Connect and Prepare the Server Once your instance starts: ssh -i ~/path/my-strapi.pem ubuntu@<EC2_PUBLIC_IP>sudo apt update && sudo apt upgrade -y Then install essentials: # Install Node.js v18 via nvmcurl -fsSL https://deb.nodesource.com/setup_18.x | sudo -E bash -sudo apt install -y nodejs build-essential git nginx pm2 We use nvm/Node18 (Strapi requires Active LTS) PM2 ensures Strapi restarts on failures or server reboot. 3. Deploy Your Strapi App A. Clone Your Code git clone https://github.com/you/your-strapi-project.gitcd your-strapi-projectnpm install B. Setup Environment Variables Create .env with:  HOST=0.0.0.0PORT=1337NODE_ENV=productionDATABASE_CLIENT=postgresDATABASE_HOST=<YOUR_RDS_ENDPOINT>DATABASE_PORT=5432DATABASE_NAME=strapiDATABASE_USERNAME=<DB_USER>DATABASE_PASSWORD=<DB_PASS>AWS_ACCESS_KEY_ID=<KEY>AWS_ACCESS_SECRET=<SECRET>AWS_REGION=us-east-1AWS_BUCKET_NAME=<S3_BUCKET> 4. Configure the Database (RDS) Strapi’s default is SQLite—not ideal for production. Use AWS RDS with PostgreSQL or MariaDB  Go to RDS, create a PostgreSQL database. Disable public access. Attach the EC2 Security Group to allow only the Strapi server’s IP  Configure Strapi for Production goto the config folder in your strapi project config/env/production/database.js:  module.exports = ({ env }) => ({ connection: { client: ‘postgres’, connection: { host: env(‘DATABASE_HOST’), port: env.int(‘DATABASE_PORT’), database: env(‘DATABASE_NAME’), user: env(‘DATABASE_USERNAME’), password: env(‘DATABASE_PASSWORD’), ssl: { rejectUnauthorized: false }, }, debug: false, },}); Install the Postgres driver: npm install pg pg-connection-string   5. Setup S3 for Media Uploads  Strapi saves uploads locally by default, which isn’t suitable for production  Steps: Create an S3 bucket. Attach correct IAM policies to your EC2 role (or use access keys). Install the AWS provider: npm install @strapi/provider-upload-aws-s3 Create config/env/production/plugins.js:  module.exports = ({ env }) => ({ upload: { config: { provider: ‘aws-s3’, providerOptions: { region: env(‘AWS_REGION’), params: { Bucket: env(‘AWS_BUCKET_NAME’) }, }, }, },}); Your media assets will now be stored securely in S3.   6. Manage the Process with PM2 Install and configure PM2:  npm install pm2 -gpm2 start npm –name strapi — startpm2 savepm2 startup systemd This ensures Strapi starts on reboot   7. Set Up Nginx as a Reverse Proxy Nginx secures your Strapi instance and enables HTTPS: Install Certbot: sudo apt install certbot python3-certbot-nginx Configure Nginx:  server { listen 80; server_name cms.yourdomain.com; return 301 https://$host$request_uri;}server { listen 443 ssl; server_name cms.yourdomain.com; ssl_certificate /etc/letsencrypt/live/cms.yourdomain.com/fullchain.pem; ssl_certificate_key /etc/letsencrypt/live/cms.yourdomain.com/privkey.pem; location / { proxy_pass http://localhost:1337; proxy_http_version 1.1; proxy_set_header Upgrade $http_upgrade; proxy_set_header Connection ‘upgrade’; proxy_set_header Host $host; }} Reload Nginx: sudo nginx -t && sudo systemctl restart nginxsudo certbot –nginx -d cms.yourdomain.com Now your Strapi is live at https://cms.yourdomain.com, secure with HTTPS.   8. Secure and Optimize Close direct port 1337 access in the Security Group Use AWS CloudWatch for logs and performance monitoring Use SSM Parameter Store or AWS Secrets Manager to manage secrets securely Regularly run npm audit and update dependencies . Consider enabling rate-limiting and strong Content Security Policy (CSP).   9. Cost and Maintenance Notes A t2.small EC2 instance + RDS + S3 generally costs $30–40/month for light workloads Pay attention to instance type—free-tier micro instances often lack memory to run Strapi    Final Note Deploying Strapi on AWS EC2 + RDS + S3 gives you a scalable, secure, production-ready CMS. You’ll learn valuable DevOps skills as you: Launch and secure an EC2 server Configure node with PM2 and environment variables Set up a managed PostgreSQL database (RDS) Store media assets in S3 Reverse-proxy traffic through Nginx with HTTPS Monitor performance in CloudWatch Once you have this foundation, you can easily scale out with load-balancers, containerization (ECS/EKS), or automated deployments.   Related reads: Why I Recommend Strapi for Quick Development Why My Strapi Deployment Kept Failing: Lessons from the Free Tier Trap External resources: Strapi Official Documentation AWS Official Documentation

Deploying Strapi on AWS EC2: A Comprehensive Guide Read More »